Upgrade Your Vercel Hosted Astro App to Bun 1.0
Hi, I'm Alex Kates 👋 I'm a product engineer currently working at Croissant as a Founding Engineer. I'm addicted to writing about building, and building things worth writing about. Some extracurriculars include AWS Community Builder Instructor at MIT xPRO Bootcamp Volunteer at Tech for Campaigns
Vercel rolled out native support for Bun 1.0 just 72 hours after its launch. That's the kind of speed that got me excited to switch my new Astro project, BullyBarks, over to Bun 1.0.
In this blog post, we're going to walk through a step-by-step guide to upgrading an Astro project to take advantage of all the features and optimizations Bun 1.0 has to offer.
Astro Project Structure
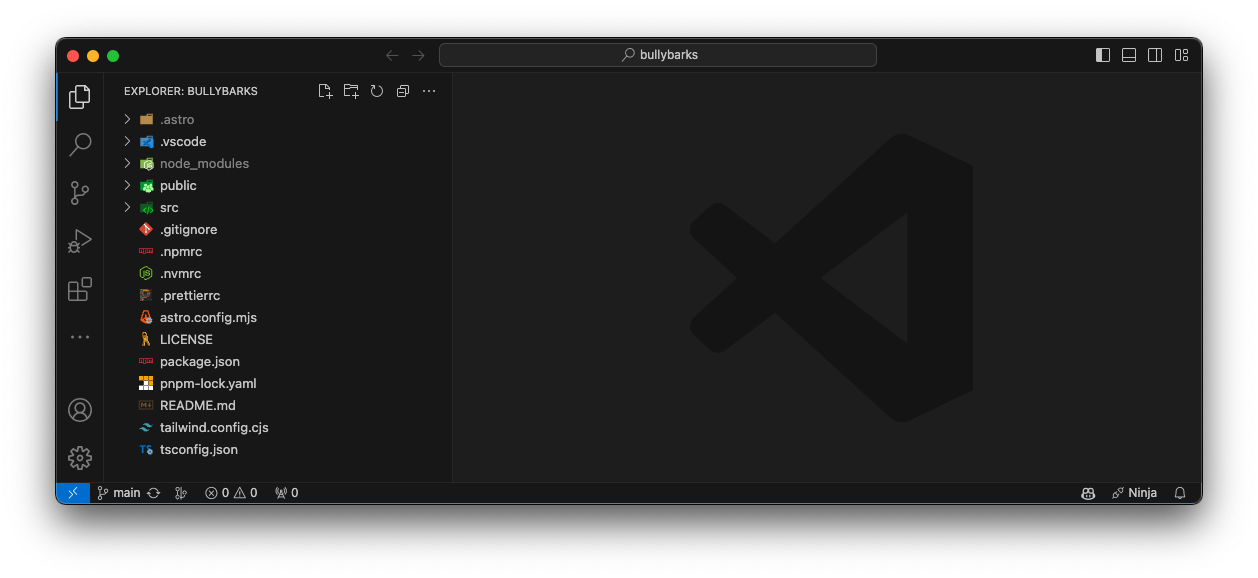
Before diving into the migration steps, it's essential to understand the existing structure of the BullyBarks project. In this Astro-based project, you'll notice a few specific files like .nvmrc (NVM), .npmrc, and pnpm-lock.yaml. These indicate that I've been using Node Version Manager (NVM), npm, and PNPM for package management. These are precisely the tools we'll be migrating away from as we transition to Bun 1.0. Now, let's break down the folder structure to better understand how the project is organized.
.prettierrc: The configuration file for the Prettier code formatter..vscode: This directory holds Visual Studio Code-specific settings.src/: Project's source code including components, layouts, and pages.public/: static filesastro.config.mjs: The Astro configuration file.tsconfig.json: The TypeScript configuration file.tailwind.config.cjs: This holds the configuration for Tailwind CSS.node_modules/: This directory contains all the dependencies for the project.dist/: The output directory generated after running Astro's build script..npmrcand.nvmrc: These are configuration files for npm and NVM, respectively.package.json: Like any Node.js-based project, this file lists dependencies and scripts.pnpm-lock.yaml: Since we're using PNPM for package management, this file locks down the versions of the dependencies..astro: Astro types directory
Install Bun
Bun ships as a single executable that can be installed in a few different ways. I chose to use the bun.sh install script below.
curl -fsSL https://bun.sh/install | bash
Verifying Bun Installation
After installing Bun, it's a good practice to verify that the installation was successful. This ensures that Bun and its accompanying executables are correctly set up in your system.
To confirm that Bun is properly installed, run the following commands:
which bun
which bunx
If both commands return valid file paths, that means Bun and BunX are successfully installed and are ready for action.
Eliminating Previous Package Managers
Time to roll up your sleeves! We're going to start by eliminating any traces of the previous package managers from the project. Delete the following files and directories: .npmrc, .nvmrc, pnpm-lock.yaml, and node_modules.
To do this, run the following command:
rm -fr node_modules .npmrc .nvmrc pnpm-lock.yaml
Install Dependencies with Bun
With the old package manager files out of the way, it's time to bring in the new star of the show—Bun. To install all of your project's dependencies using Bun, simply run the following command:
bun install
Run Astro Dev with Bun
Now that Bun is installed and verified, you can use it to run your Astro development server. bunx, an accompanying tool of Bun, enables you to run package scripts without requiring system-wide installs.
To fire up the Astro development server using bunx, execute the following command:
bunx --bun astro dev
--bun flag forces the executable to run using Bun's runtime, irrespective of the shebang specified in the script. By default, Bun respects shebangs such as #!/usr/bin/env node, launching a Node.js process to execute the file. The --bun flag ensures the executable runs using Bun's runtime, overriding any shebang in the script.If you're following along with the steps, your console output should closely resemble the screenshot below:
Update package.json Scripts
Now that you're running Astro with Bun, you'll want to update your package.json scripts to make this change permanent. Update the scripts section in your package.json to look like the following:
"scripts": {
  "dev": "bunx --bun astro dev",
  "build": "astro build",
  "preview": "bunx --bun astro preview",
  "astro": "bunx --bun astro"
},
build script doesn't use Bun. This is intentional. If you're deploying on Vercel, they handle Bun execution for you during the build process. You can read more about how Vercel manages this in their documentation.Push to Vercel
After you've made your changes and updated your package.json, commit and push your updates to GitHub. This action will trigger a new build on Vercel.
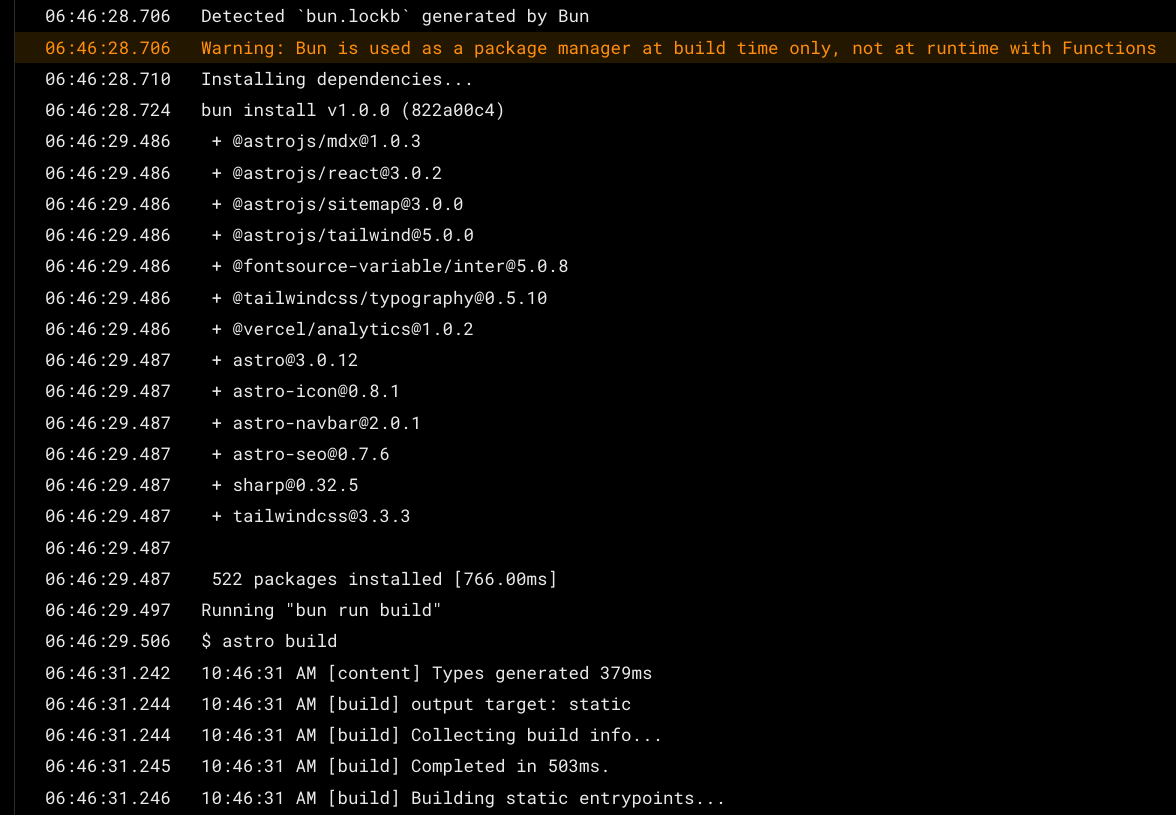
The screenshot confirms that Vercel recognizes we're using Bun and handles the installation and build process accordingly.
Wrapping It Up
So, there you have it—switching your Astro project over to Bun is pretty much a breeze. And let's be honest, who wouldn't want the extra speed that Bun brings? Just a few tweaks to your package.json, and you're pretty much set.
The best part? Vercel's added Bun support within 72 hours of launch. Vercel detects that your repository is using Bun and handles the install and build steps for you.
I'm still blown away by Bun and all that it promises, and props to Vercel for seeing it as well.
If you found this helpful, give it a like and follow me here on Hashnode and Twitter at @thealexkates. Cheers, and happy coding! 🚀