Hosting Custom Fonts in AWS

Hi, I'm Alex Kates 👋 I'm a product engineer currently working at Croissant as a Founding Engineer. I'm addicted to writing about building, and building things worth writing about. Some extracurriculars include AWS Community Builder Instructor at MIT xPRO Bootcamp Volunteer at Tech for Campaigns
Alright, here's the scenario: You're a front-end developer who was just given a stunning custom font from your designers, and they're incredibly excited about it. They want to use it as soon as possible. However, you're only familiar with using fonts from Google Fonts and are unsure how to handle these ttf/woff2 files. You find yourself asking questions like, "Where should I place these files?" and "How do I write the appropriate CSS to utilize them?". Fear not; I recently faced a similar situation and would like to share with you exactly how I handled this situation.
In this post, we will guide you step by step on how to take custom font files and host them on a Content Delivery Network (CDN) in AWS. We'll be using the AWS CDK, TypeScript, and Bun to manage various AWS resources, including S3 and CloudFront, to deliver your stunning custom fonts to the edge, close to your users and apps.
We will then build a new Next.js app in a Bun monorepo. This Next.js app will use our new CDN to pull in our new fonts. We'll write the CSS and font-face code to properly use our new font.
Project Setup
To start we need to set up our new project. Were going to be using Bun, TypeScript, and the AWS CDK. Utilizing these tools together allows us to use a single language, TypeScript, across our entire repository. It will also make it incredibly easy to transition to a monorepo powered by Bun later on in this article.
cdk init
Begin by opening your terminal and running mkdir how-to-host-custom-fonts-in-s3 to create a new directory specifically for this project.
Next, navigate to this new directory with cd how-to-host-custom-fonts-in-s3, and run bunx cdk init app --language typescript. Bunx is an alias for `bun x` and functions similarly to `npx`.
mkdir how-to-host-custom-fonts-in-s3
cd how-to-host-custom-fonts-in-s3
bunx cdk init app --language typescript
nvm use
Next, we'll need to run a couple more commands to properly set up Node and install our dependencies.
I usually have multiple work and personal-related projects on my laptop, so managing Node.js versions across all of them is crucial. I prefer using a .nvmrc file at the root of my projects. For this project, we will utilize Node.js version 20.
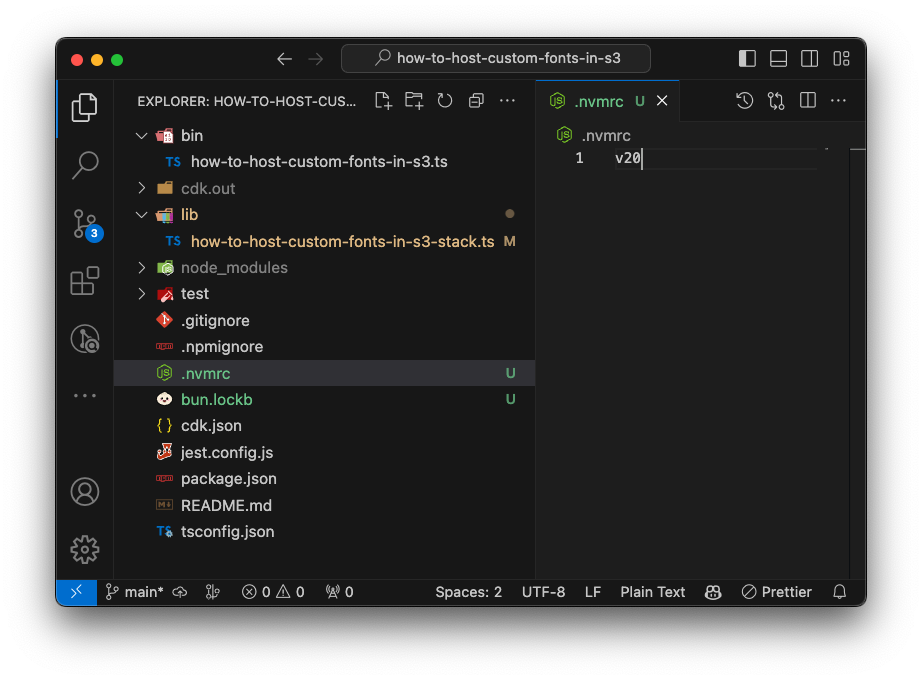
Let's create a .nvmrc file at the root of our project and set its value to v20, which is the latest version of Node.js.
Great! Now just a few more commands to finish setting up our development environment.
nvm install v20
nvm use
nvm install v20: Installs Node.js version 20 using Node Version Manager (nvm).
nvm use: Activates the installed Node.js version for the session.
bun install
Now we are going to switch from npm to Bun as our package manager. I'm personally a big fan of Bun and have been slowly migrating all of my existing projects to use it. For any new projects, Bun is a default for me.
The AWS CDK scaffolds new projects using NPM as the package manager. To switch to Bun, we need to delete the package-lock.json and run bun install. Simply run the following commands to do so.
rm package-lock.json
bun install
rm package-lock.json: Removes the
package-lock.jsonfile that was created by ourcdk initcommand earlier.bun install: Installs project dependencies using Bun.
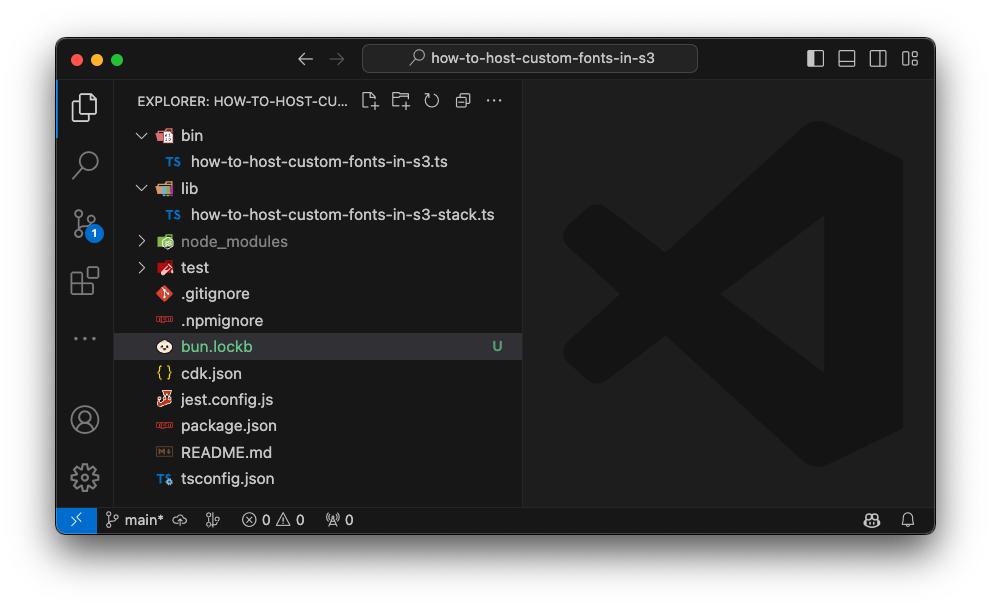
If everything goes smoothly, your folder structure should resemble the image below. The most crucial aspect is that you now have a bun.lock file. This lockfile functions differently from npm or yarn, as it is a binary file rather than plaintext. The primary reason for this is to enhance performance. Bun’s lockfile saves & loads quickly and saves a lot more data than what is typically inside lockfiles.
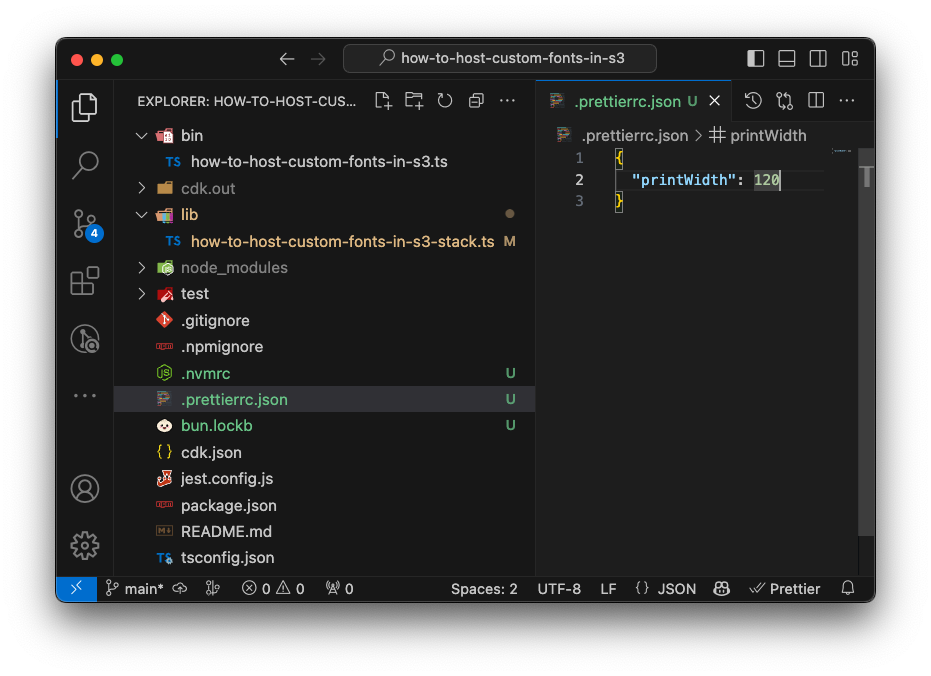
.prettierrc.json
The following configuration is based on personal preference. Since I have a widescreen monitor, I prefer to set my Prettier printWidth wider than the default. In this case, I'm using a value of 120.
Building the stack
For our font hosting and delivery setup, we will be implementing several key AWS services:
S3 Bucket: Used for reliable and organized storage of font files. It's the main storage component.
CloudFront Distribution: Acts as the delivery mechanism, ensuring rapid distribution of fonts to users globally.
CloudFront Origin Access Identity (OAI): A security feature that allows CloudFront to securely access S3 fonts without public access.
CloudFront Cache Policy: Dictates caching behavior to optimize performance and costs, affecting load times and bandwidth.
CORS Configuration: Essential for cross-origin resource sharing, it enables secure usage of fonts across different domains.
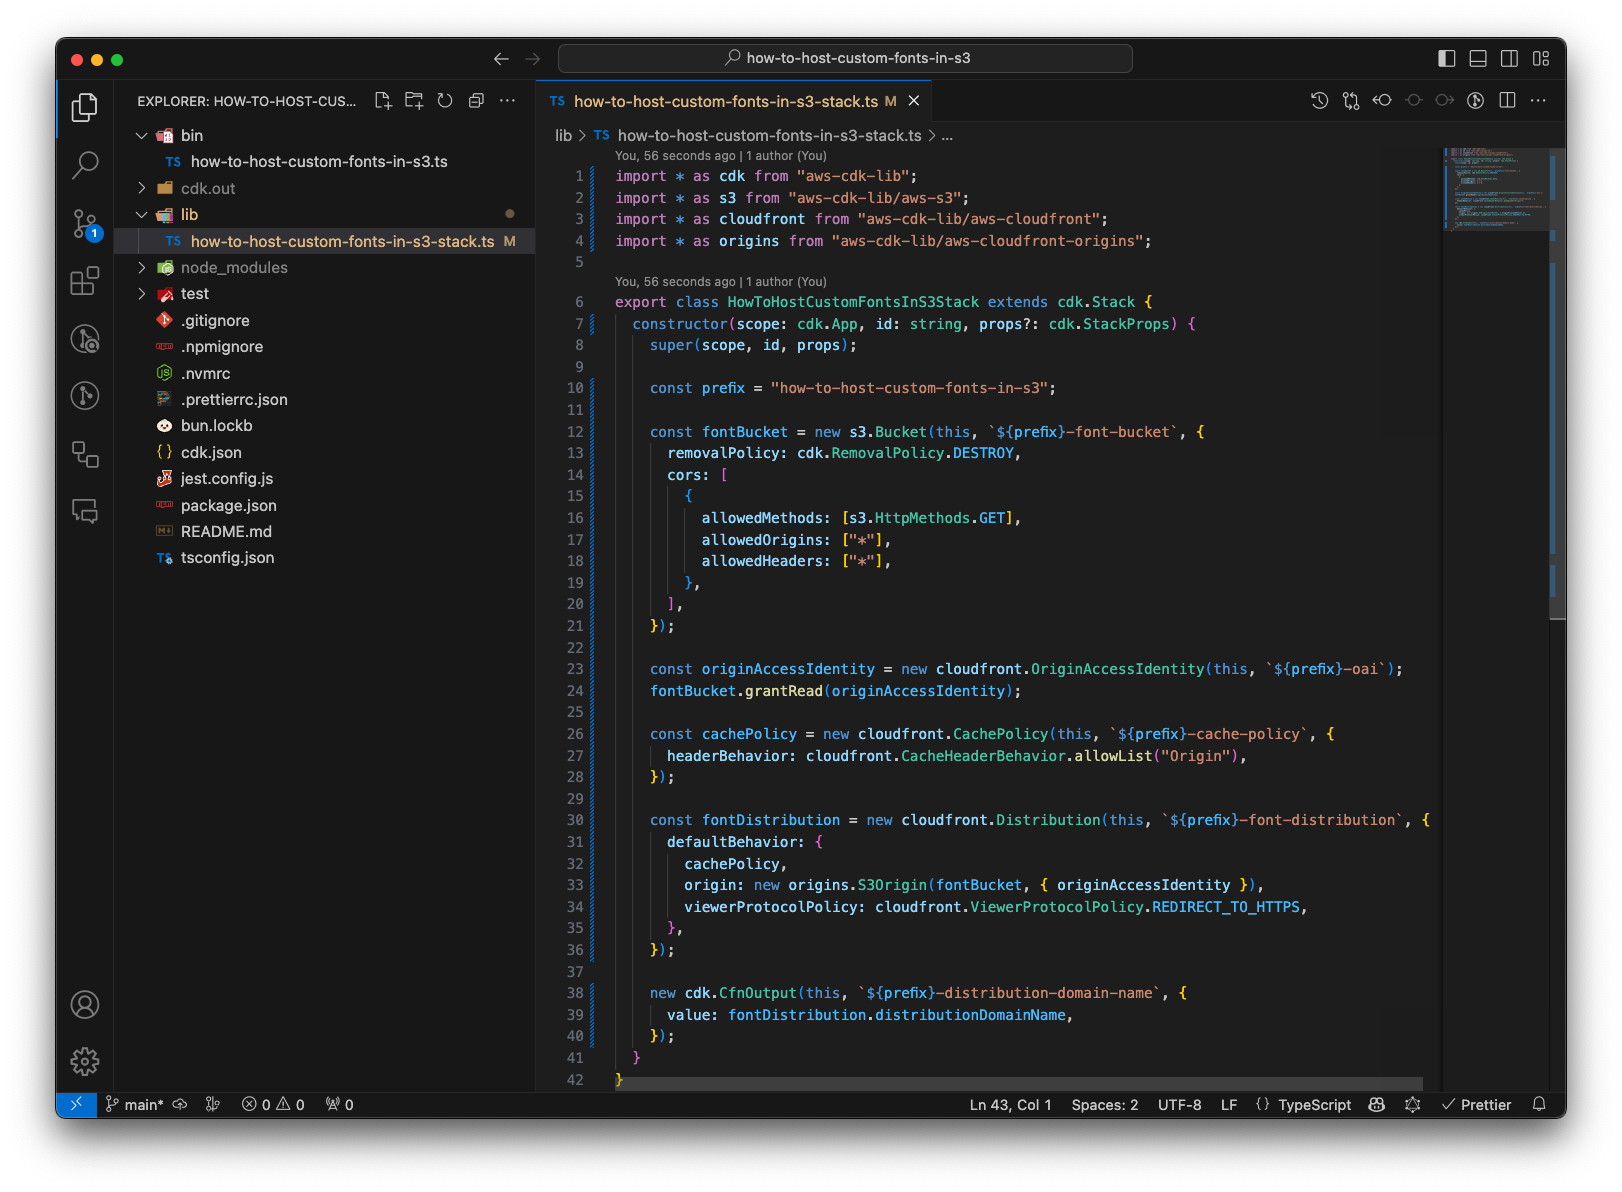
Let's break down exactly what is happening here, line by line.
Imports: Bringing in necessary CDK modules for S3, CloudFront, and CloudFront origins.
Stack Definition: Creating a custom stack class
HowToHostCustomFontsInS3Stackextending the CDKStack.S3 Bucket Setup: Initializing an S3 bucket with a removal policy and CORS configuration, allowing
GETrequests from any origin.Origin Access Identity: Creating a CloudFront Origin Access Identity (OAI) for secure access to the S3 bucket contents.
Bucket Permissions: Granting read permissions to the OAI for the S3 bucket.
Cache Policy: Defining a CloudFront cache policy to control header behavior, particularly for the 'Origin' header.
CloudFront Distribution: Setting up a CloudFront distribution with the cache policy, an S3 origin linked to the OAI, and enforcing HTTPS.
CDK Output: Outputting the domain name of the CloudFront distribution for easy access post-deployment.
It's time to deploy this stack to AWS. Simply run bun cdk deploy --require-approval never. If all goes well, you will see an output similar to the one below. Pay particular attention to the distribution domain name output, as we will use it later to construct the URL for fetching the font files.
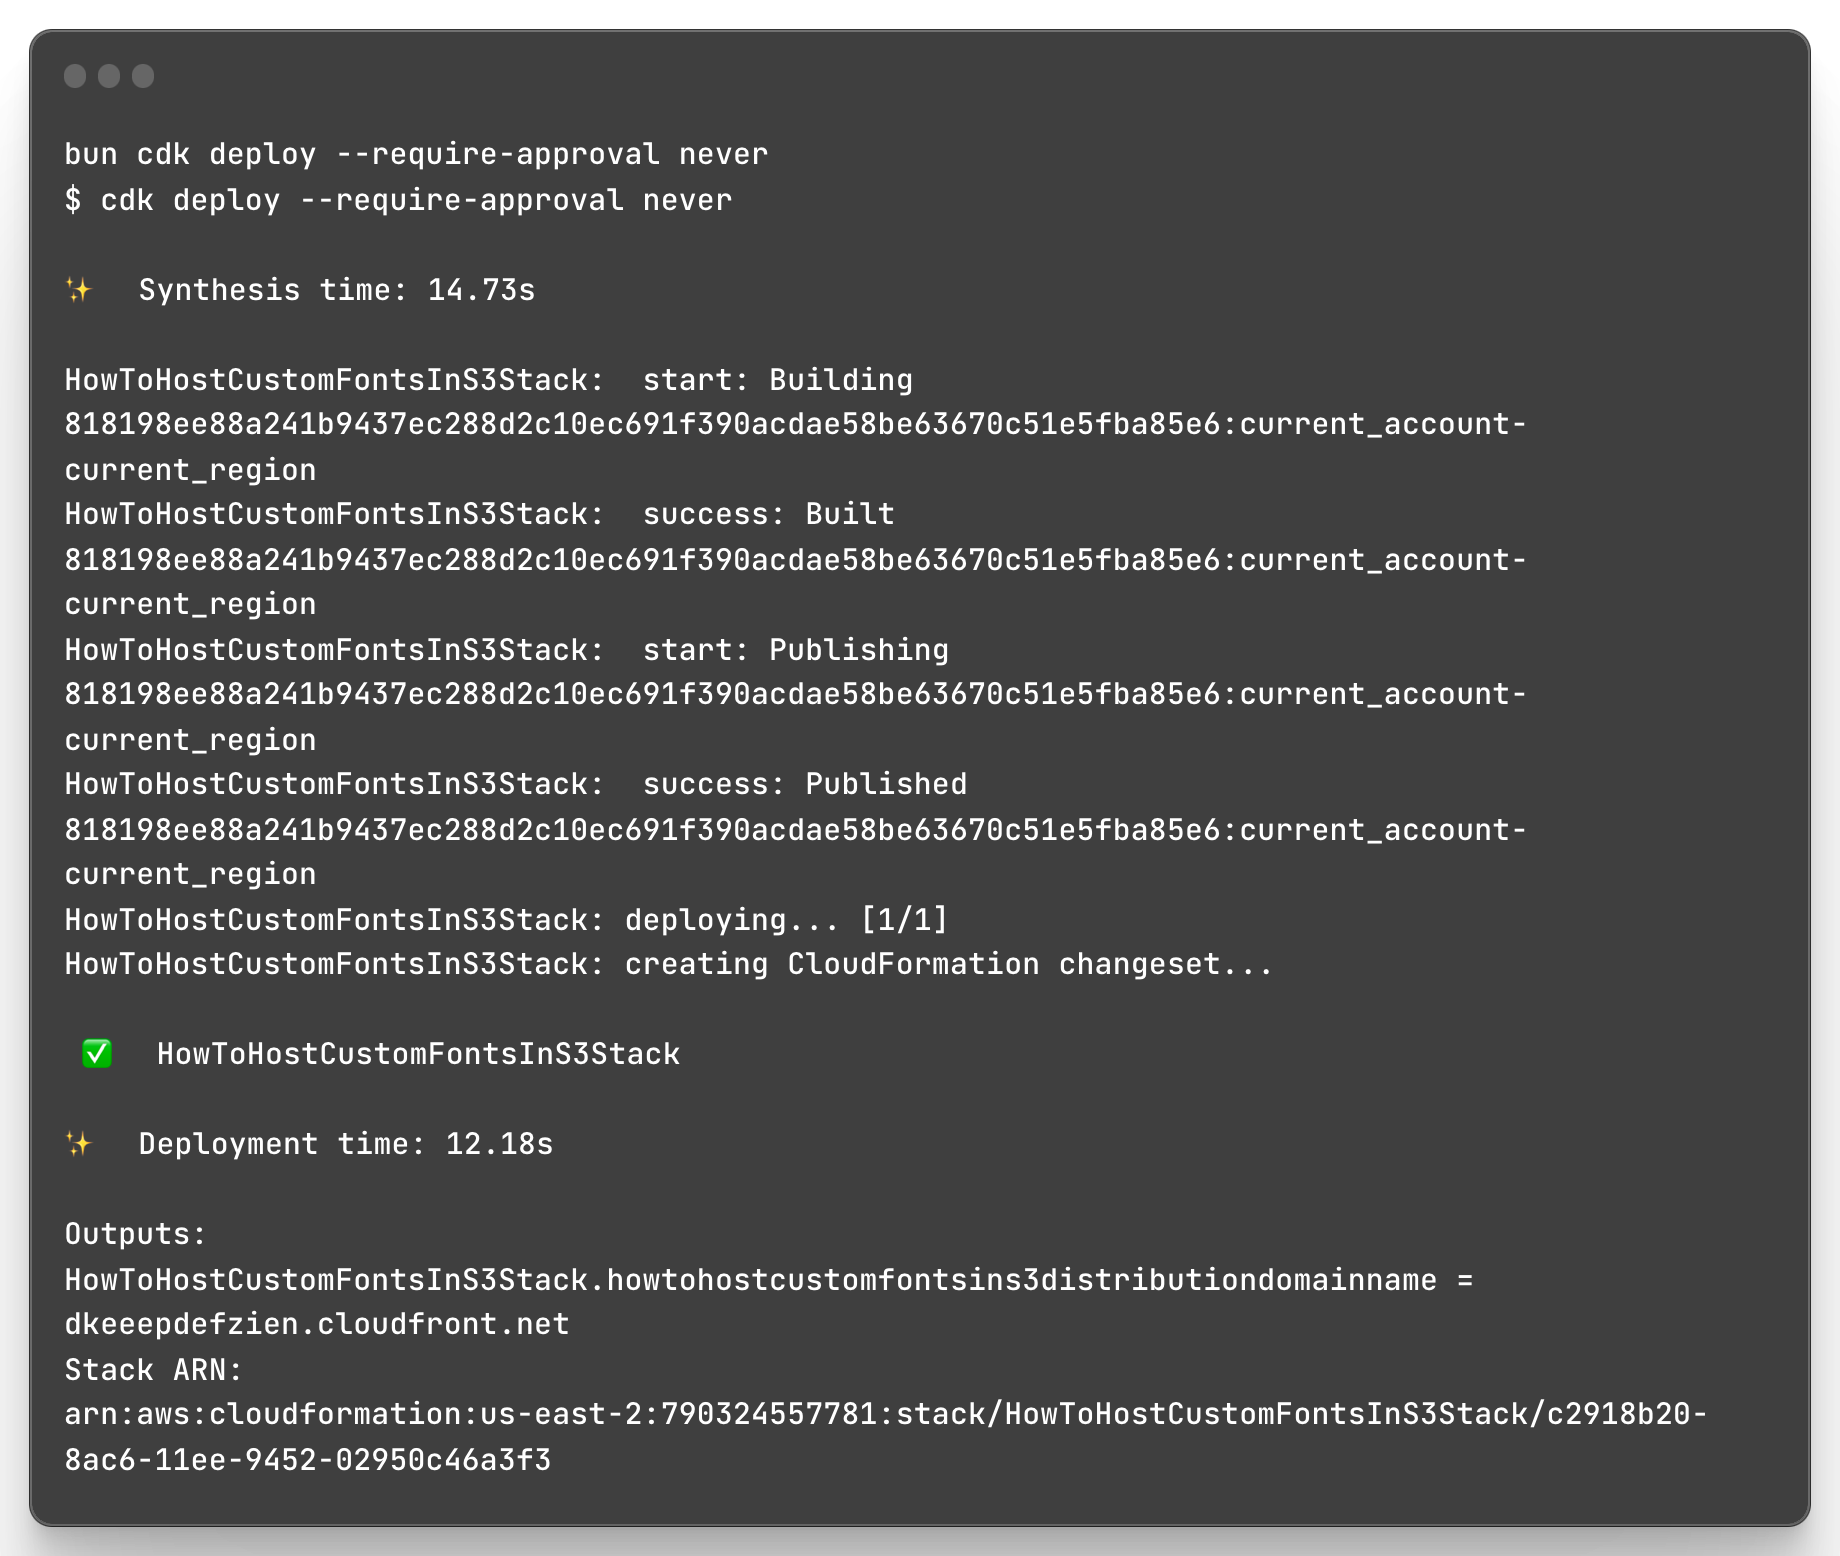
That's it! In just about 45 lines of TypeScript and AWS CDK code, you can create a CDN using CloudFront, backed by S3, to host your custom fonts. These fonts will be readily available at the edge, wherever your users access your web application.
Upload Fonts to S3
For simplicity, we will use the Montserrat font from Google, but the specific font is not important. If you have a completely custom font, this same solution will work just as well! This also works for any type of font file, including TTF, OTF, and WOFF.
Log in to AWS Management Console: Open your AWS account and navigate to the S3 service.
Select Your S3 Bucket: Locate and access the S3 bucket designated for the 'Montserrat' font files.
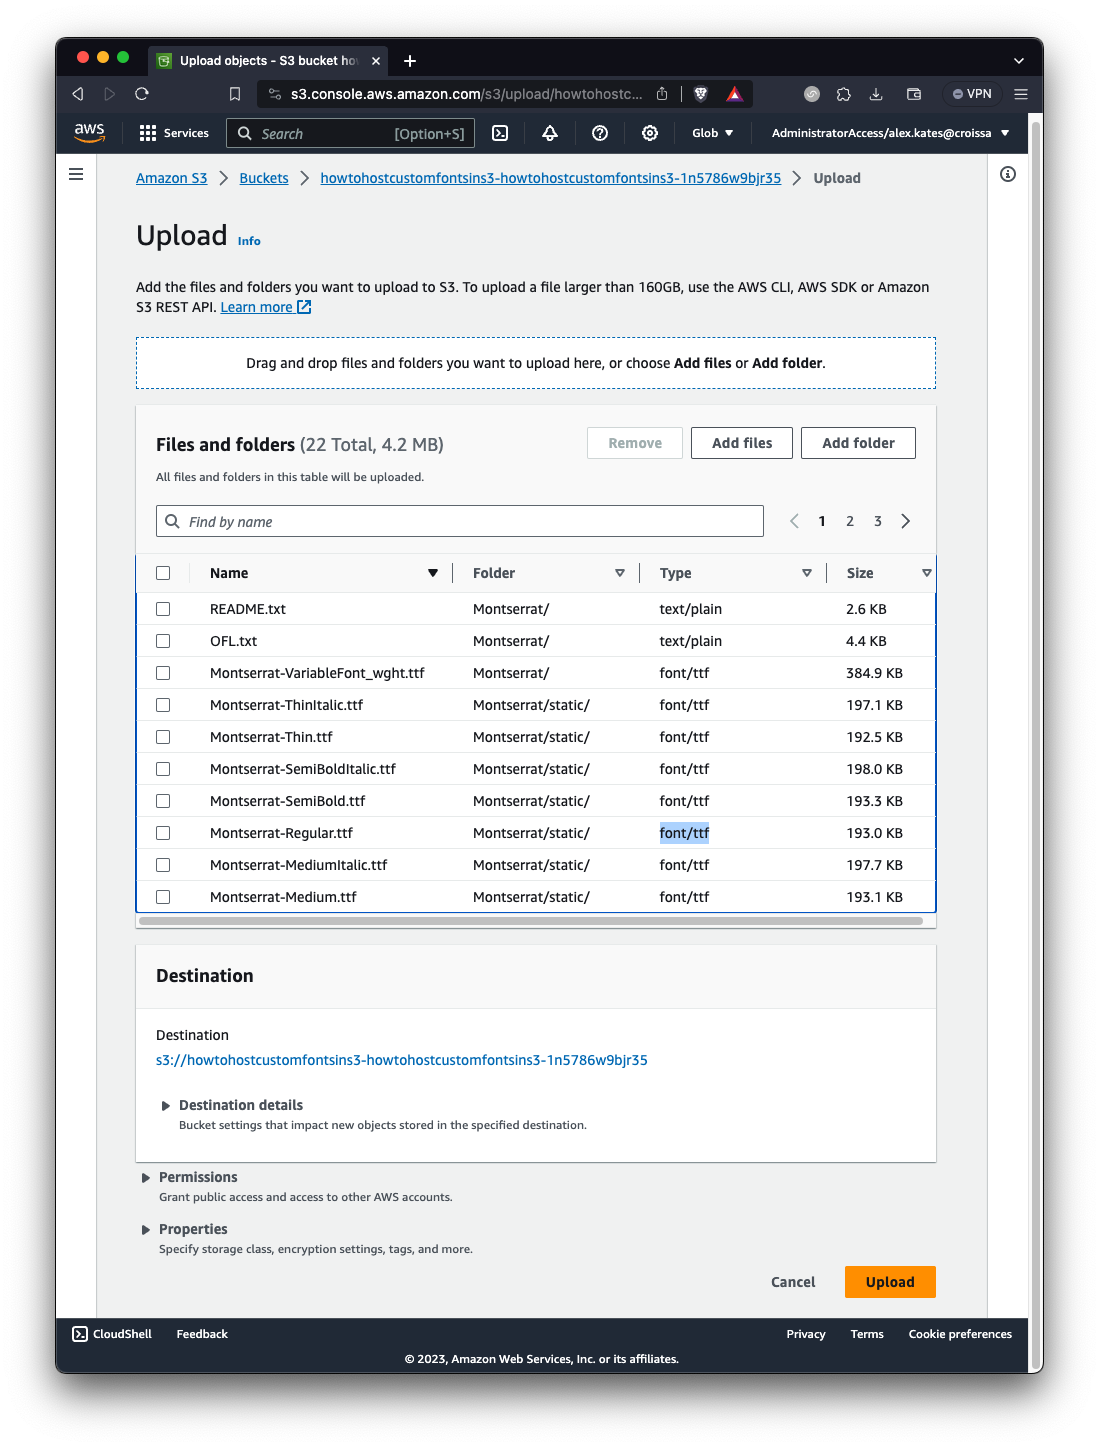
Upload 'Montserrat' Folder: Click on 'Upload', then 'Add folder', and select the 'Montserrat/static' folder which includes various font files like 'Montserrat-Regular.ttf'. Ensure the MIME type for each file is set to 'font/truetype'.
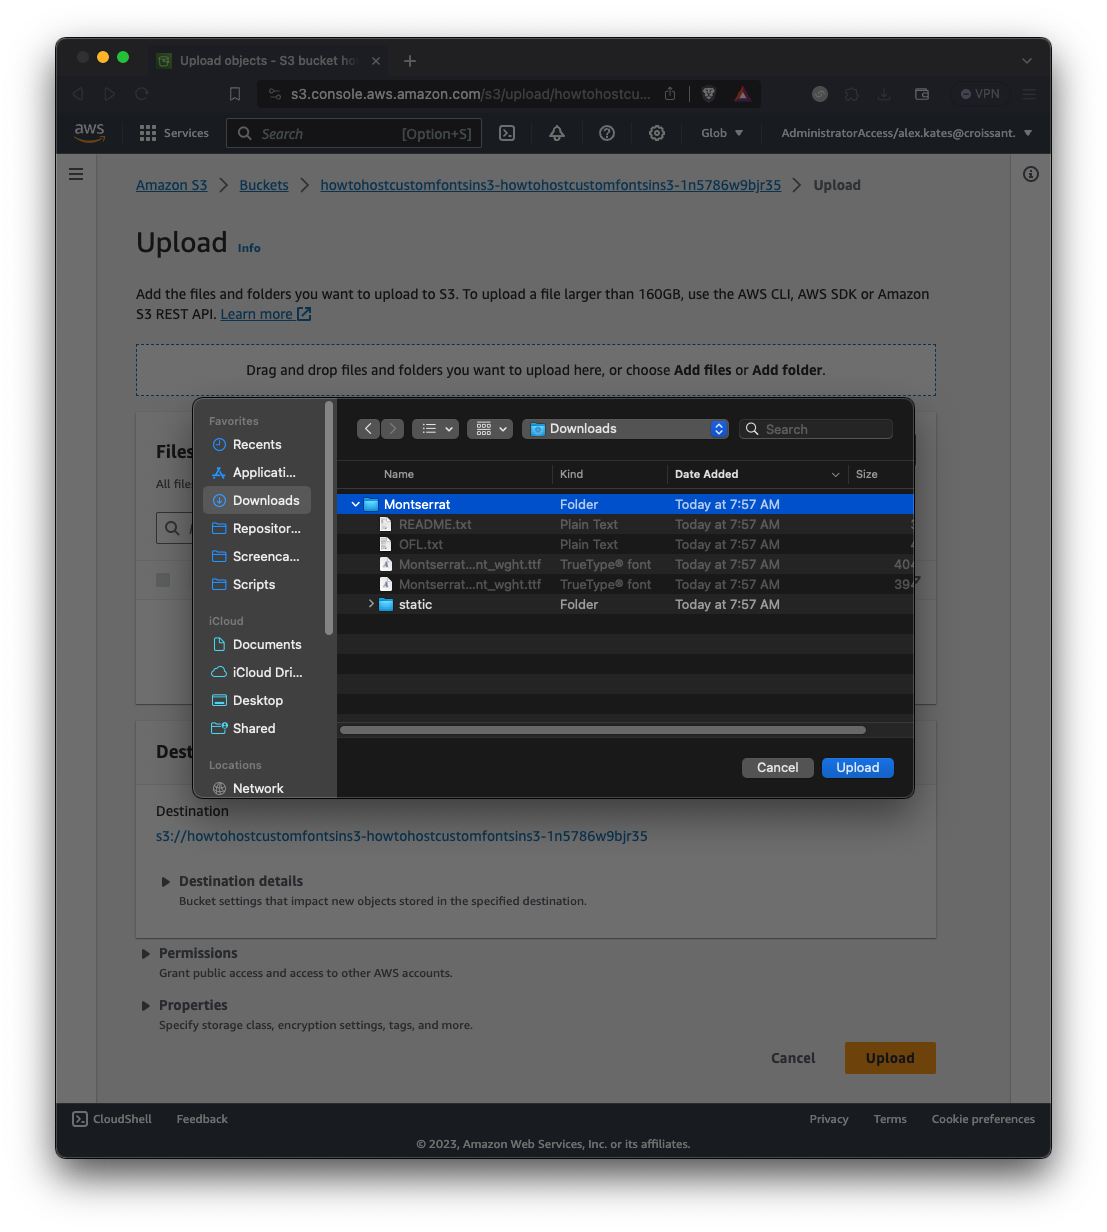
Review and Upload: Double-check that the MIME types are correct and proceed with the upload. If the MIME type is incorrect, you may encounter a CORS error later, which can be a nightmare to debug.
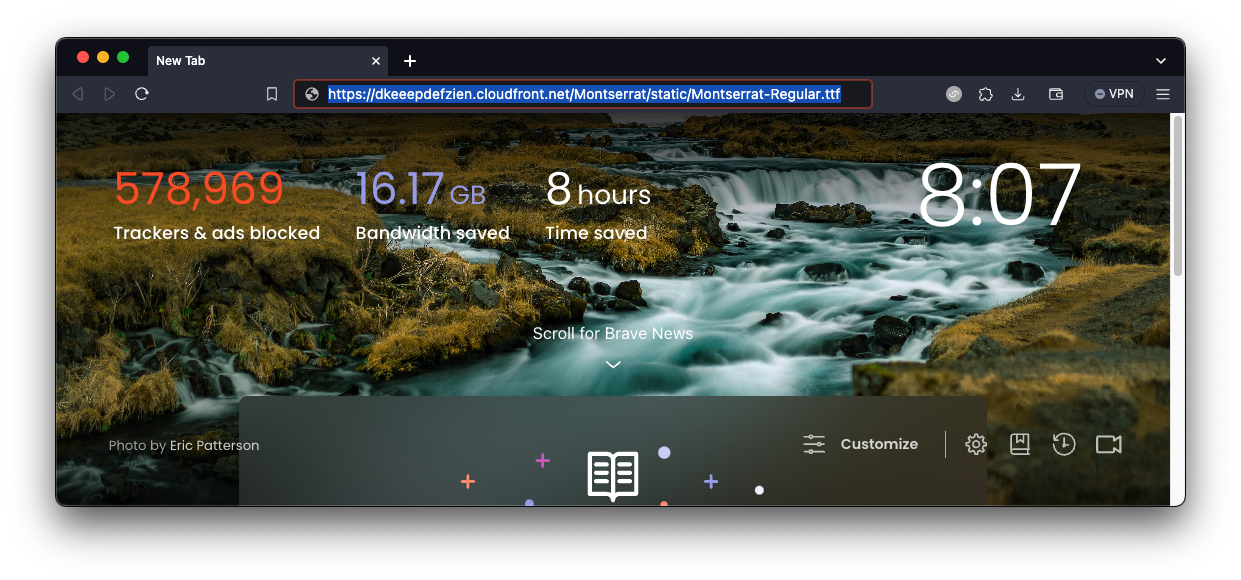
Verify Upload: Refresh the bucket post-upload to confirm the Montserrat folder and its contents are uploaded. To test the 'Montserrat-Regular.ttf', use this URL format in your browser: https://dkeeepdefzien.cloudfront.net/Montserrat/static/Montserrat-Regular.ttf. This URL combines your CloudFront domain with the file path, allowing you to verify the successful hosting of the font file.
Test with cURL: The last thing to verify is to make sure the proper Content-Type header is set. This is important for browsers to handle the font file correctly.
curl -I https://dkeeepdefzien.cloudfront.net/Montserrat/static/Montserrat-Regular.ttf
If everything is working, you should be able to download the file by navigating directly to https://dkeeepdefzien.cloudfront.net/Montserrat/static/Montserrat-Regular.ttf. Also, the cURL command should produce output like the following.
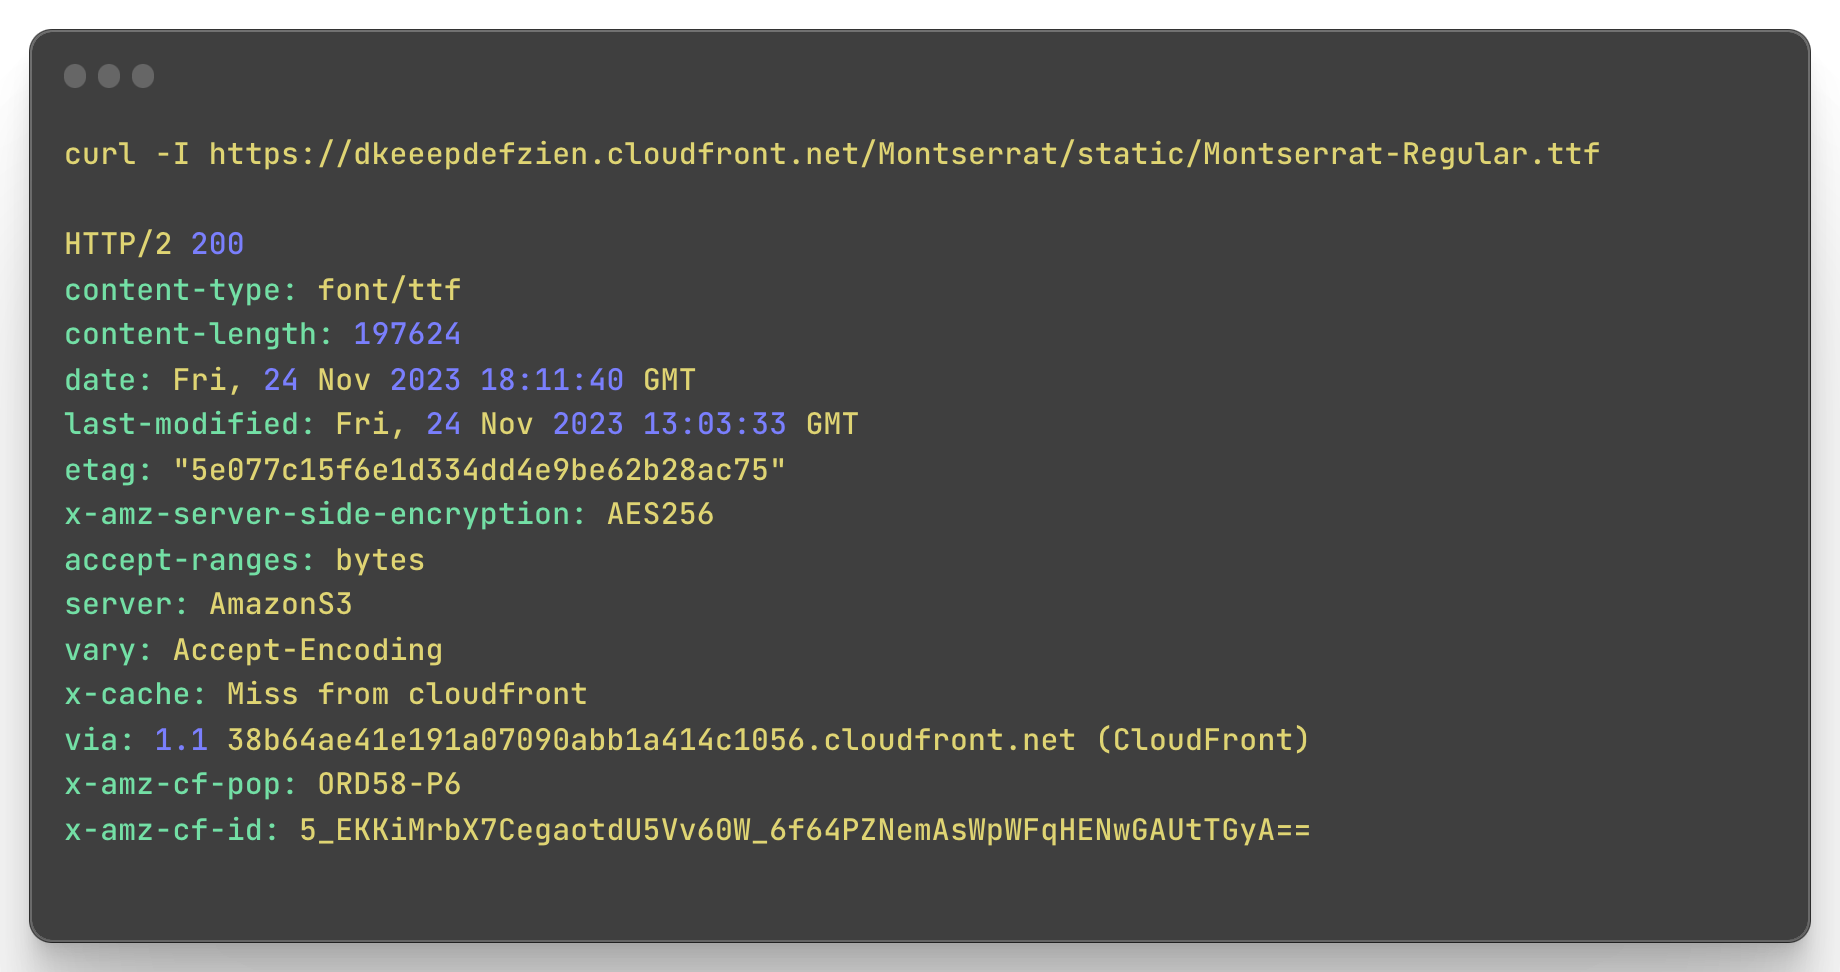
Congratulations! You now have a functioning CDN hosting your custom font, which you can download directly from your web app.
Extra Credit
Now let's have some fun! In this section, we are going to ...
Convert our project to a Bun monorepo
Add a Next.js app
Fetch and use our custom fonts
Convert to a Monorepo
Monorepos with Bun are straightforward and have the added benefit of hoisting common dependencies to the root of the repository.
From the root, create the folder
/packages/fonts-cdnMove everything from the root to /packages/fonts-cdn
Delete /packages/fonts-cdn/node_modules
Update the name of /packages/fonts-cdn/package.json to be "fonts-cdn"
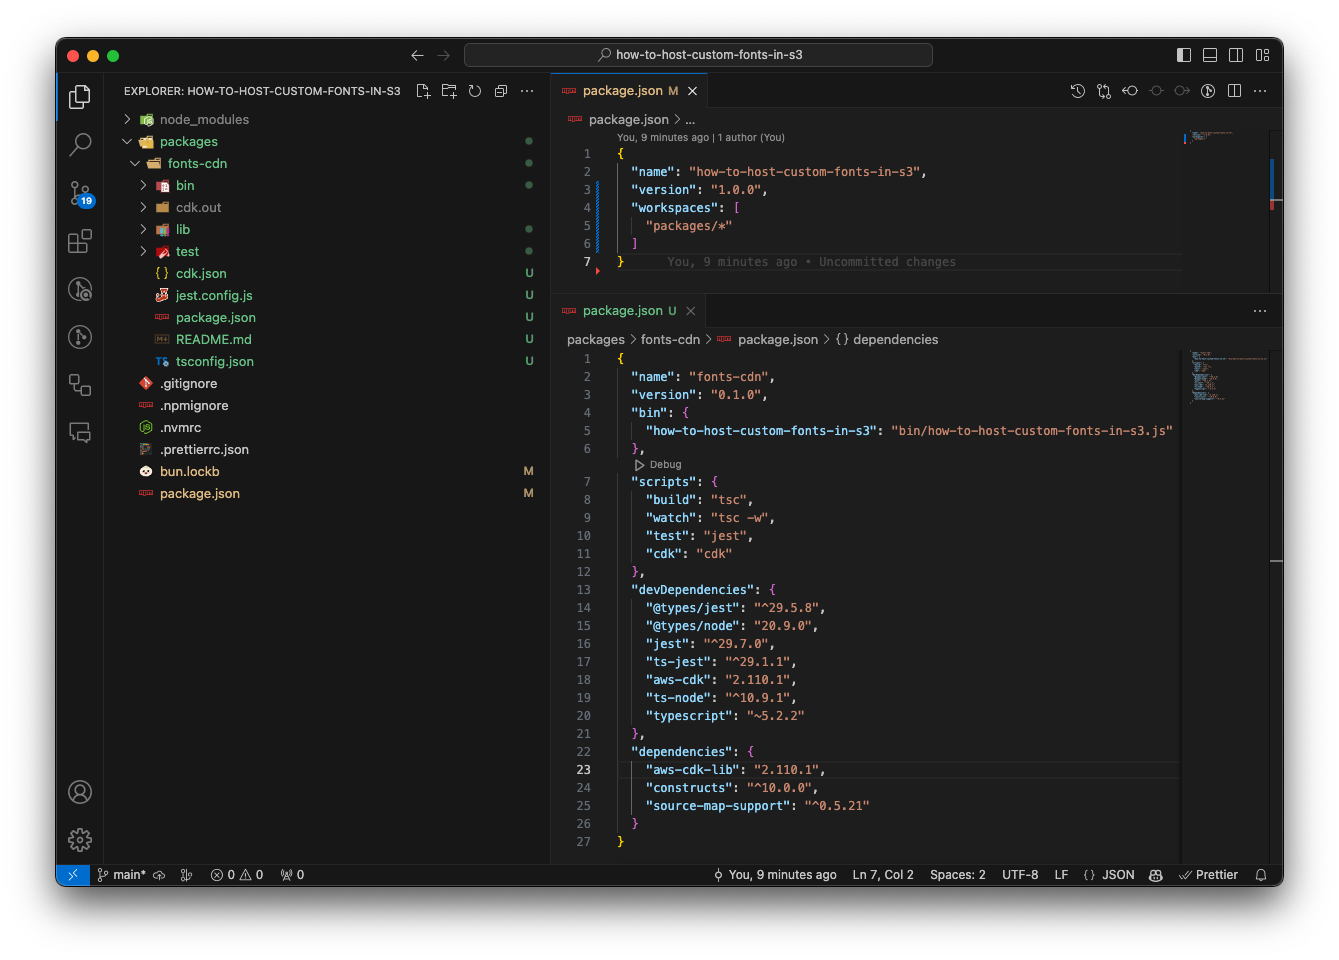
Create package.json in the root and set it to the following
 {
   "name": "how-to-host-custom-fonts-in-s3",
   "version": "1.0.0",
   "workspaces": [
     "packages/*"
   ]
 }
From the root, run
bun install
Your project should now resemble the structure below:
Create a Next.js app
Now let's scaffold a Next.js using create-next-app and Bun.
cd packages
bun create-next-app
Step through the normal create-next-app prompts and you should see an output that looks like this.

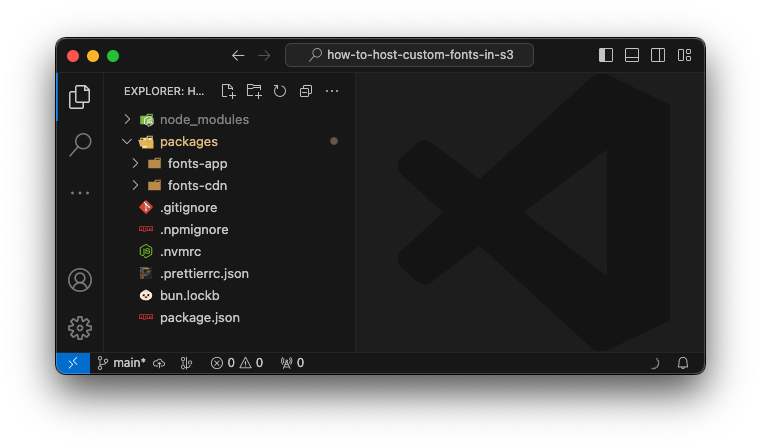
After completing the create-next-app prompts, your project should resemble the following structure. You will notice that there are now two packages. The first one is "fonts-cdn", which was our AWS CDK app from part 1 of this walkthrough. The second one is our newly created Next.js app called "fonts-app".
Great! Let's run the Next.js app in development mode and ensure everything works properly. From what I understand, with Bun, you need to change directories (cd) into the package you want to run and then execute the development command. This is slightly different from Yarn, where you can stay at the root and run the 'yarn workspace' command followed by the desired command.
cd packages/fonts-app
bun dev
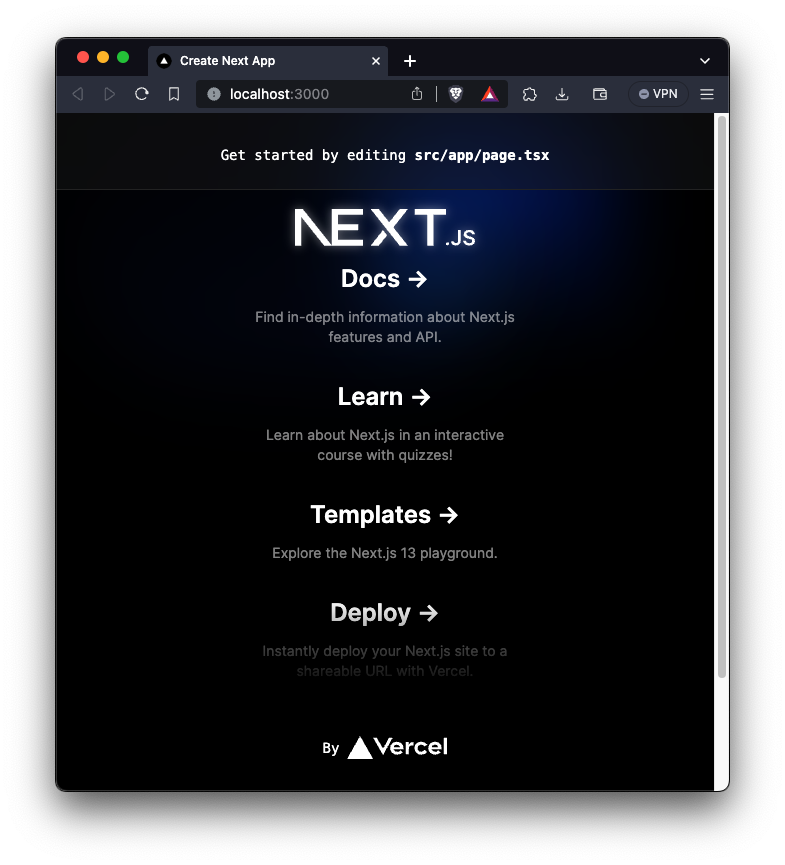
open http://localhost:3000
You should see the iconic Next.js default page!
Use the Font CDN
Fantastic, we now have all the components necessary to utilize our custom fonts hosted on our CDN. When it comes to using a custom font with Next.js and Tailwind, there are several options for customizing Tailwind.
I recommend these docs from Tailwind Toolbox, which explain the differences between various Tailwind font customizations. Essentially, you can either overwrite or extend the default Tailwind theme, and your approach will affect the appearance of your generated Tailwind utility classes.
For the sake of brevity, let's host our CSS locally and overwrite the existing Tailwind utility classes. However, this decision ultimately depends on your specific use cases.
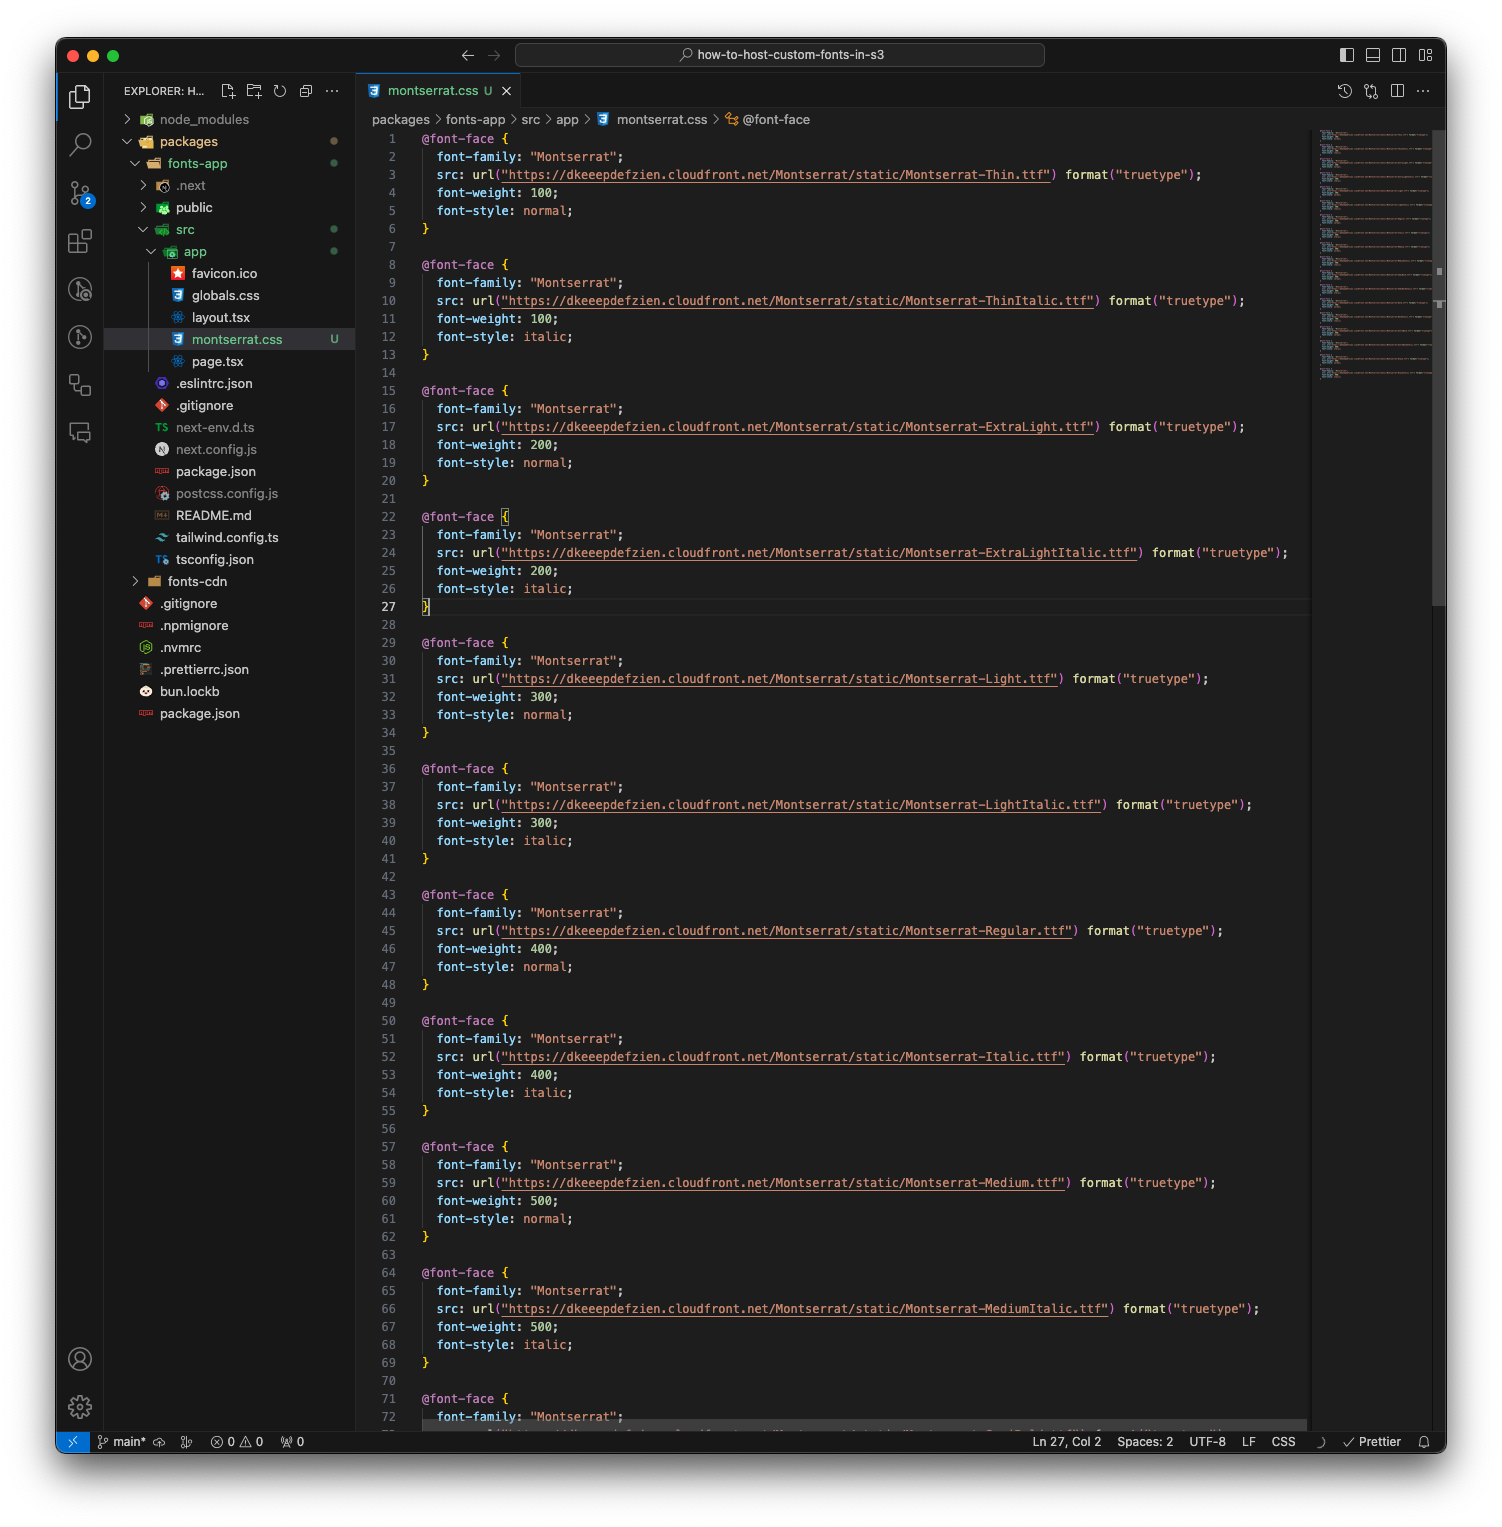
Create montserrat.css
First, we must create a CSS file that defines our font faces. The crucial aspect is to establish a font face for each font file, taking into account font weight and italics. Call this CSS file 'montserrat.css' and place it in fonts-app/src/app/montserrat.css.
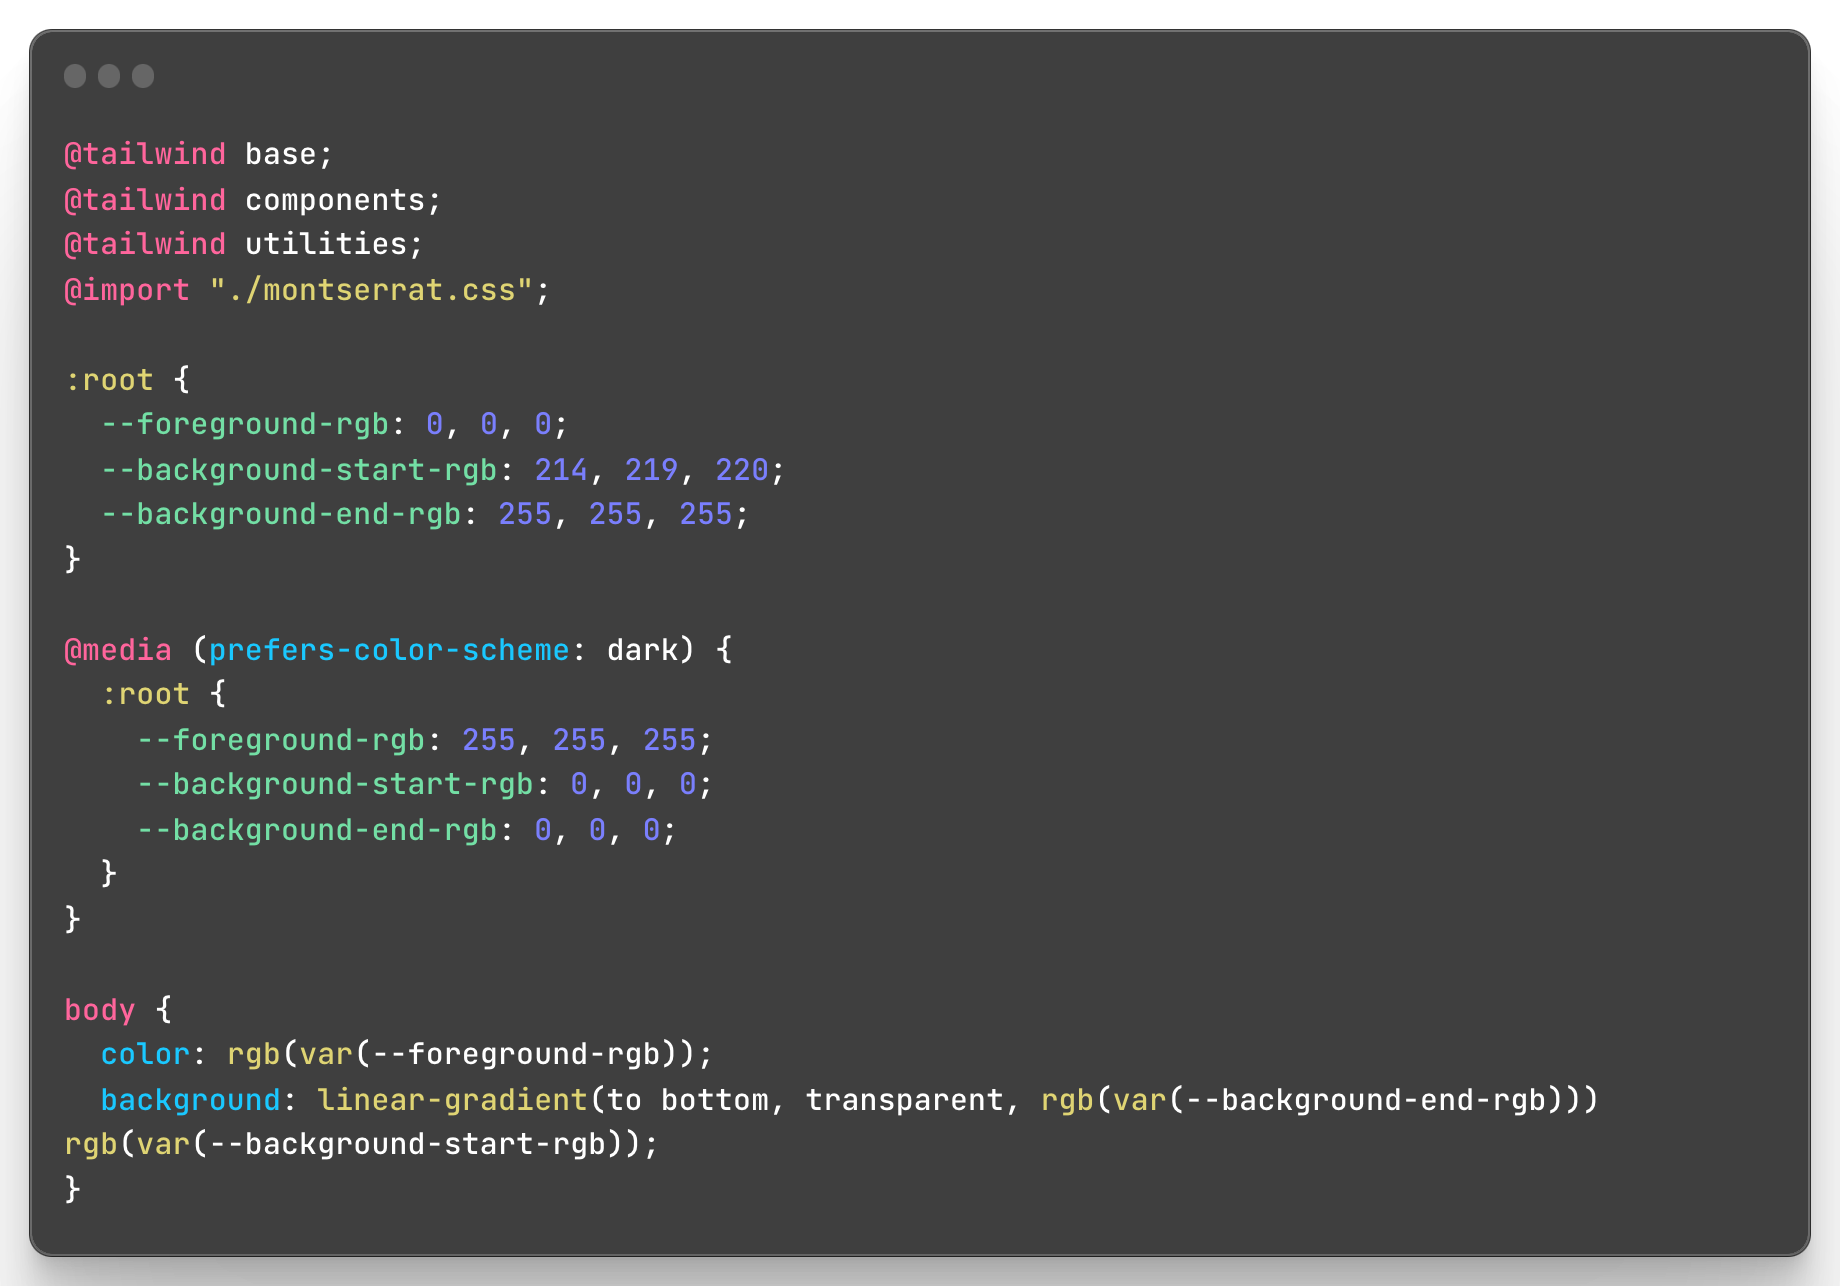
Update globals.css
Next, make a one-line change to 'fonts-app/src/app/globals.css' to include 'montserrat.css'. Simply use the @import statement in 'globals.css' to incorporate the new CSS file. After making this change, your 'globals.css' should resemble the following.
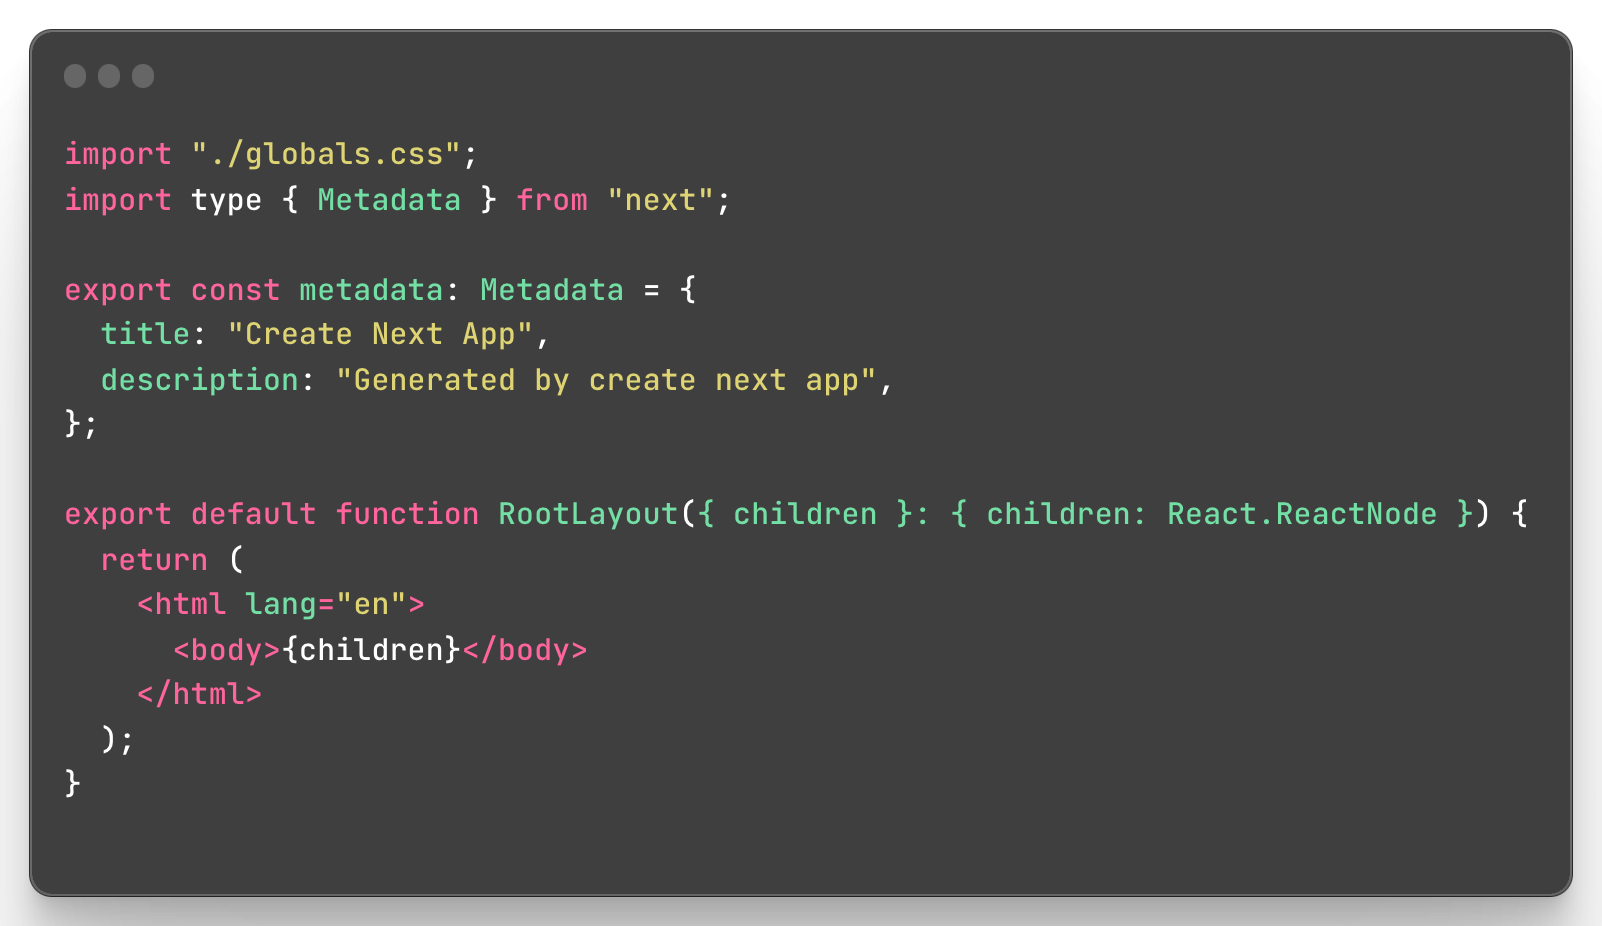
Delete next/font/google
The latest version of Next.js comes with an excellent font optimization system. However, it doesn't directly align with our use case since we want to host our font on a CDN for multiple apps to utilize. Therefore, we will remove the font optimization code for now.
Navigate to fonts-app/src/app/layout.tsx and eliminate any usage of next/font/google and Inter. Once completed, your layout.tsx should resemble the following.
Update tailwind.config.ts
Since we are using Tailwind, we need to inform it that we want to use Montserrat as our sans-serif font family. Tailwind makes this process quite straightforward. There are several ways to customize your font family with Tailwind, depending on your use case and objectives. For this walkthrough, we will override the default sans-serif font so that the out-of-the-box utility classes seamlessly use our Montserrat font. To accomplish this, update your tailwind.config.ts file, specifically the config.theme.fontFamily.sans value. Once updated, it should look like the following.
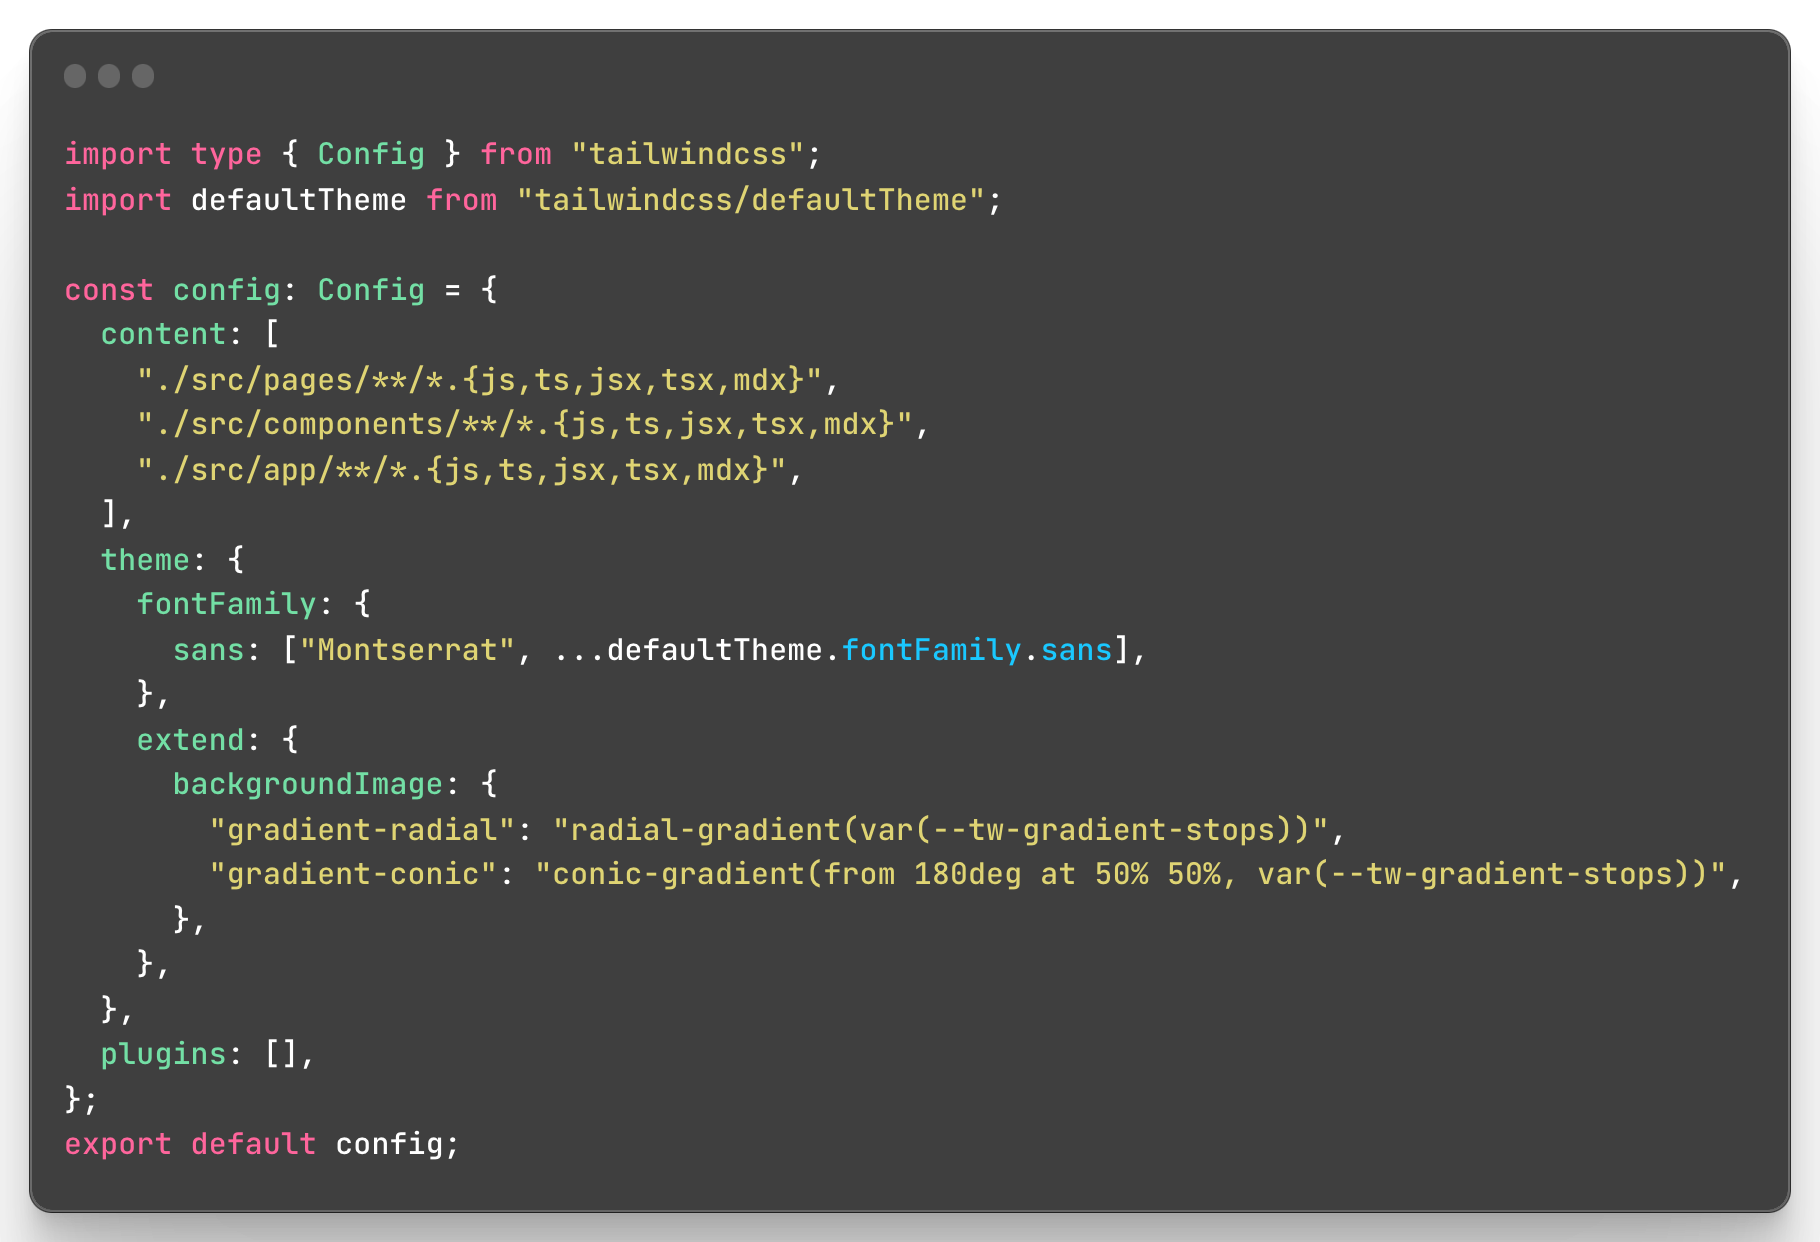
Notice that we are setting the sans font family to an array, with the primary value as Montserrat and using the spread operator to include the default settings as backups.
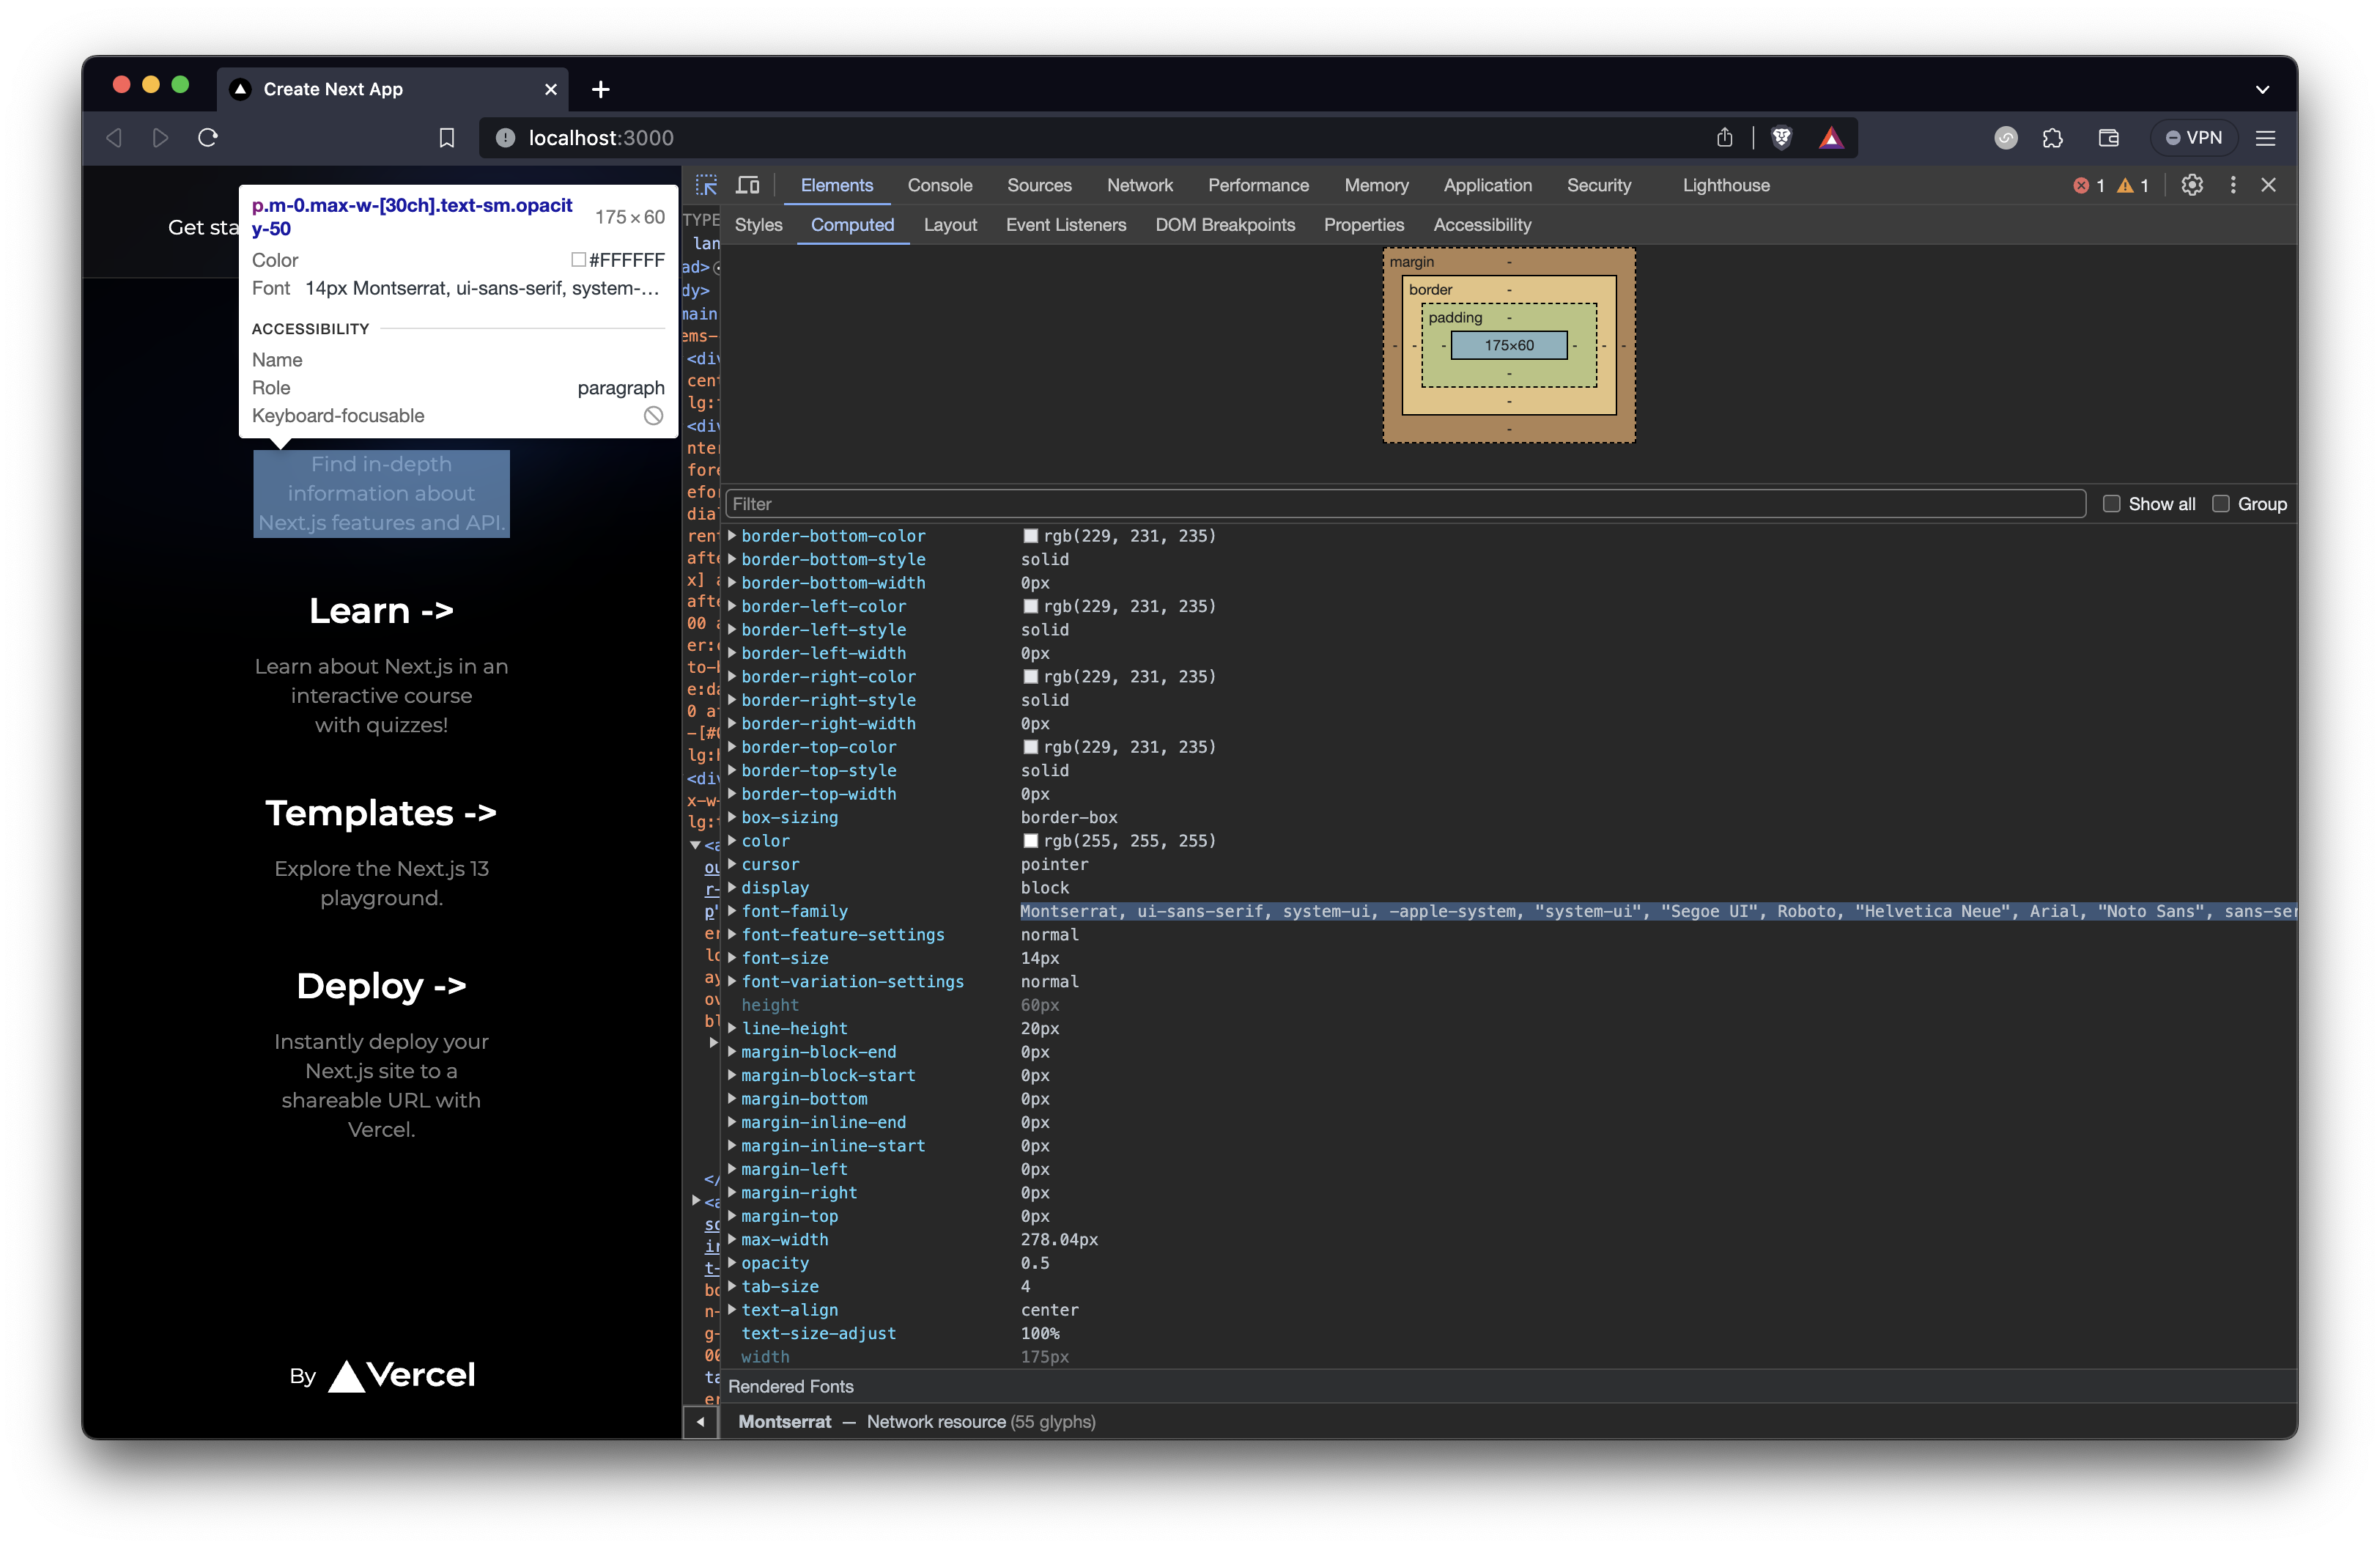
Testing it all out
Awesome! Now let's test our new fonts and setup. Restart your dev server by running the following commands.
cd packages/fonts-app
bun run dev
open http://localhost:3000
If everything is working, the default Next.js page should now be using the Montserrat font and should look like the following image.
Thanks for reading!
Congratulations! If you made it this far, you successfully hosted custom font files on a Content Delivery Network (CDN) in AWS using AWS CDK, TypeScript, and Bun. We covered setting up the project, building and deploying the stack, uploading fonts to S3, and utilizing the CDN with a Next.js app.
If you found this content helpful, please consider liking, sharing, and following me here on Hashnode and at https://twitter.com/thealexkates.